A new owner of an older 8SE asked me what I thought were the priority accessories to get to go with the stock package (mount, OTA, and 25 mm Plossl). I thought it would be an easy answer, and then realized it is almost as difficult to answer as what scope would be best for someone. But I did respond and thought I could maybe turn it into a post too. Obviously it all depends on what they want to look at the most and from where. Maybe even with whom. Nevertheless, here are my thoughts on some extra considerations.
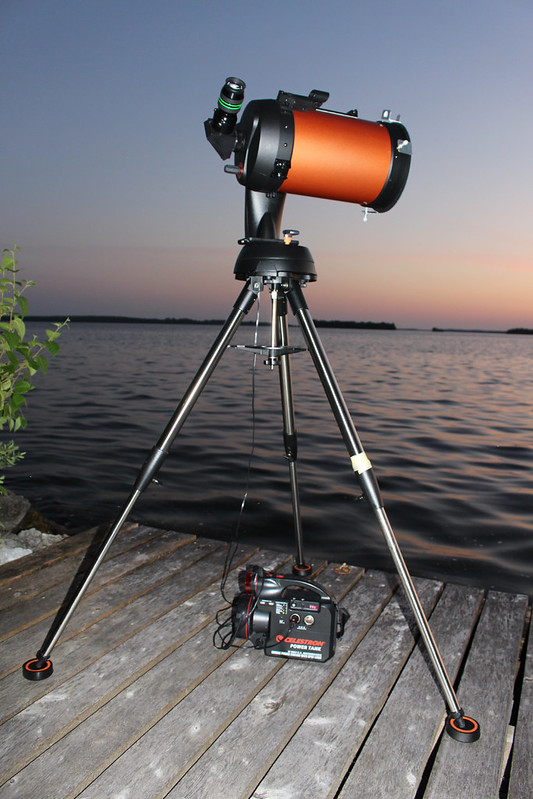
A. A good power source. I have the Celestron Lithium-Ion tank, which seems to work well for me, but I wouldn’t necessarily want to use it for a 12-hour viewing excursion. I have two old Powertanks and I may try to revive them to just use as a backup.
B. Tools to help with levelling. A simple bubble level, or apps like Cliniometer for an Android phone. I need it to make sure the scope is level before trying to align.
C. A tool to help with GPS. If you know where you are going beforehand, Google Maps will give you the coordinates. Or use an app like GPS COORDINATES for your Android phone.
D. Something to replace the spotter. The 8SE comes with a red-dot finder that just about everyone hates. And a TelRad works awesome. Huge upgrade for me for a low cost. One of the best additions I ever did. But if someone rarely does manual spotting other than at the first couple of alignment stars, the red-dot might be good enough.
E. Something to help with Skymaps. A simple sky map, a book, or an app, all of them will work to give you an idea of what is up there to look at. I like Stellarium and Sky Safari.
F. Dewshield. I don’t know that I use the “dew” part that much. I don’t often observe into the morning hours, I don’t often observe on grass, and I’m not often observing for a long time for it to heat up. However, the added benefit is that it provides a light shield to the front of my scope. Blocking out stray light from the sides. I have had dew problems from time to time, but I wouldn’t say a lot, and I have no idea if my screen would have it without the shield. Perhaps. But again, you could wait and see if you have problems.
G. Vibration suppression pads. Great if you’re using a deck or dock, also good even if you’re in dirt or sand and the legs “sink”.
H. Red light flashlight. They’re available everywhere, often even dollar stores, and thus not super expensive. Great for showing respect for other astronomers (white light is deadly to night vision). I prefer one with an optional white light for the end of the night when I’m packing up.
I. Green laser pointer. This is definitely not a priority, but a great tool to have if you’re explaining stuff to other people and you want to point to various stars.
J. Good chair. I like being able to sit at the telescope and stare at a few things without having to stand for hours bending awkwardly for some objects. I have one with variable height which is great.
K. Stool. If you are viewing with children, a simple step stool of some sort can save a ton of grief trying to adjust to everyone’s height.
L. Storage and transport containers. There are a lot of little parts and they can get lost easily. I use a grocery bin to carry all my accessories, and most of them are kept within plastic kitchenware containers with lockable lids. Nothing is going ANYWHERE I don’t want it to go. I use a large gym/travel bag for my scope. Tables and chairs and mounts, oh my, all travel basically as they are.
M. Photography accessories. You can do impressive but basic AP with an 8SE, it’s not designed for AP, not really. Now, how do you get images?
Take photos by hand of the night sky. Not great.
Take photos with a tripod of the night sky. Much better.
Stand at the eyepiece with your smartphone and try to centre it by hand to take a pic of whatever you’re looking at…not a very effective method most of the time. iPhones with the NightCap app work the best.
Get a small mounting bracket that attaches to your smartphone (Android or iPhone) and to an eyepiece, and then take photos. Much better result.
Get a small mounting bracket and attach a compact camera to your telescope. Very frustrating experience.
Get a webcam of some sort, tied to a laptop, and take stills and video. Good result, but more expansive setup and a huge range in quality and price.
Get a series of rings and adapters and connect your DSLR camera directly to the telescope, takes a lot of practice and more than the scope is really designed to handle. Doable.
N-Z. Optical accessories
Star diagonals help a lot to protect your neck and back from injuries requiring chiro or massage.
Colour filters can help bring out details in planets.
Oxygen III and ultrablocks can help with things like nebulae.
Tons of options out there, and it all depends on what you want to look at most often, and in how dark of skies.
And I haven’t even talked about eyepieces. I think for my use, I need three lenses approximately, plus a 2X Barlow (it halves the size of your eyepiece, basically).
While the 8SE has a theoretical limit of 4mm to take it to 500x magnification, practical use outside of dry dark skies is likely somewhere between 200x and 300x.
The stock 25mm is great for basic things, even a bit of planetary stuff, and not bad for galaxies, nebulae, etc. with a magnification of 81x. With the Barlow, I also get 12.5mm or 160X-ish.
My favourite lens for more power is a Televue Delos with a great field of view at 17.3 mm. 9mm-ish with the Barlow and that puts me at the usable max most of the time.
I also have a 32mm lens which is pretty great. Good for bright chunks of the sky and making things nice and bright. With the Barlow taking me to 16mm, not much different than my 17.3 so would use that instead.
Finally, while those three EPs are probably my workhorses, I also have a big 42mm 2″ EP. A huge chunk of sky. Great for large regions, like the Veil Nebula.
And I don’t have the technical know-how to go much beyond those size issues to talk about eye relief and field of view very reliably.
I’m sure there are lots of other things to mention, but the optics depend so much on the person and their targets, there’s not much to add other than my own preferences.
Here are my “four” options, although the first two are obviously tongue-in-cheek:
A. Give up — either get a different scope or take up knitting…I actually thought about both.
B. Do it wrong for five years until two people help you figure out why it’s not working (see above two posts).
C. Regular Auto Two-Star alignment – Short version…I’ll give the full write-up below with all the bells and whistles, but this will just be the short process steps.
Setup tripod;
** If you are using a wedge, add wedge plate underneath;
** If you are using vibration suppression pads, set them under the legs;
Add mount/arm;
Attach Optical Tube Assembly (OTA), and then retighten the supporting plate on the tripod with the new weight on it;
Plug in the power source;.
Turn on scope, lower tube to a horizontal position, turn off scope;
Level the scope;
Turn on scope;
Align spotter scope or TelRad or red-dot finder;
Press enter to start alignment;
Change to AUTO TWO-STAR;
Hit BACK/UNDO to go back to CUSTOM SITE, enter GPS COORDINATES;
Enter time, date, DAYLIGHT SAVINGS TIME or not, and timezone;
Choose a star from the formal list, centre it roughly in the eyepiece, press ENTER, fine-tune your centring (Up and Right as last movements) by eyeball, reticule or doughnut methods, press Align;
If you used the doughnut method, refocus to a tight star point view;
Choose Star 2, let it slew to near that spot, centre star roughly in eyepiece, press ENTER, fine-tune alignment (Up and Right again) by eyeball, reticule, doughnut methods, press Align;
Wait for “Alignment Success” message;
Test your alignment on the two alignment stars you used;
Turn off your TelRad or another device;
Start looking for new objects!
D. Regular Auto Two-Star alignment – Long version
Setup tripod, extend legs;
** If you are using a wedge, add wedge plate underneath to ensure legs are at full extension and locked;
** If using vibration suppression pads under the legs, add them underneath;
Add top of mount/arm if not already attached (I leave mine attached all the time);
Attach Optical Tube Assembly (OTA)…some people attach it with the tube horizontal, Celestron nameplate facing you and readable, tightening knob underneath. I find it FAR easier to have the knob facing left so that I am attaching the OTA vertically with the opening facing up and my star diagonal / backplate facing down. This allows me to rest the star diagonal in my right hand while standing “behind” the arm, and guiding it with my left hand into the mounting rail slot. Then I tighten. By doing this, I also make sure that my star diagonal has clearance underneath i.e. the thickness of my hand, so just in case when I’m viewing I go to zenith, it will clear my base. This works awesome for me. I also then retighten the support plate under the tripod — when the weight gets added, it often goes a bit wider so the plate isn’t “tight” anymore;
Plug in the power source, as the AA batteries drain quickly (which will then make the alignment and mount start to go wonky fast);
Turn on scope, lower tube to a horizontal position, turn off scope;
Level the scope…now that the weight is on it, you need to level it, mostly by adjusting the height of the legs on the tripod. I have both a simple bubble level (allows you to see all directions, not just the one direction that a typical hand level shows you) and an app on my Android phone called Cliniometer / called Bubble level on iOS;
Turn on scope, wait for the screen to clear (about 3-5 seconds);
Align spotter scope or TelRad or red-dot finder. Note: When you are using your spotting tool, the benefit is that it and your scope should be pointing at the same thing, so if you see it in your spotting tool, you should see it in your scope. Therefore, you can use your spotting tool to find something, and then move to your scope. However, this only works if the two tools (spotting tool and telescope) are actually pointing at the same thing as closely as possible. This step is to make that happen before you start trying to align your scope. First, find a distant object on the horizon, like the top of a telephone pole or a tree. If it is already dark, you might have to use something really bright and easy to find like the moon or a really bright star, but it is better to do it in the daylight. Second, use your spotting tool to move your scope so it is pointing close to it, and then look through the telescope to fine-tune your view, centring your object in the view of your scope. Third, once it looks dead centre in your scope, your spotting tool (spotting scope / TelRad / Red-dot finder) have little manual adjustment knobs, dials, or screws to do a small physical adjustment (without moving the scope) so that it points to the same place your scope is looking. At this point, then, your scope is looking at a distant object and is centred on it, AND your spotting tool is now centred on it too. From this point on, you can use your spotting tool to point at anything in the sky, and your scope should be looking at the same object too. [Note: Generally, I find TelRads are the quickest and fastest spotting tool, but some people like having a separate spotter scope mounted. Nobody likes the red-dot finder. However, regardless of the three options, the process is generally the same];
Press enter to start alignment;
Change from STAR ALIGN (i.e. default 3-star) to AUTO TWO-STAR;
It will then ask you for some basic data, but if you have changed locations from the last time you viewed, you should hit BACK/UNDO to go back to where it says something like CITY DATABASE or CUSTOM SITE, and if possible, use CUSTOM SITE. It will then ask you for your GPS coordinates in longitude and latitude by HOURS:MINUTES:SECONDS. Google Maps will give you the coordinates if you go to the exact spot, and then right-click on the spot, choose What’s Here. It shows you decimal coordinates, click on them and it will show them in HOURS:MINUTES:SECONDS. Or skip GOOGLE MAPS and download an app like GPS COORDINATES for Android or iOS which will tell you directly, or use software like Sky Safari or Sky Portal by clicking on settings, current location. It will give you the exact coordinates you need. Enter both longitude and latitude. Ignore the negative sign, it will ask you if it is north/south or east/west. [My coordinates are 45 degrees for latitude and I enter that with minutes and seconds and choose West; -75 degrees for longitude so I enter 75 plus minutes and seconds and choose NORTH to handle the negative part). Note that alternatively you can use the city database, rather than GPS coordinates, but cities are large, and the larger the city, the greater margin of error you are adding to the process;
Enter your time, date, whether it is DAYLIGHT SAVINGS TIME or not, and the timezone you’re in. Best if you can be as accurate as possible on your time;
Now you’re ready to choose your first star. The scope will give you an obvious list of good stars to choose from. If you are like me and aren’t always sure which one is Polaris (don’t ask), or Vega, choose one that you can learn and that you can’t miss. For me, that’s Mizar, and it’s almost always on the list (if it isn’t there, I can do MANUAL TWO-STAR and select it). I can almost always see the Big Dipper when I’m viewing, and it is pretty clear which one in the handle is Mizar. Plus it’s a double star so if I look through the scope and see it, I know if it is Mizar or I’m off i.e., it’s pretty easy to tell if it is the right one or not. The alignment of your first star takes TWO steps. First, you get it in your FoV generally using your red dot finder (blech) or a TelRad or spotting scope — you just need to get it close enough so you can see it in the eyepiece, don’t worry how close to centre it is. Then, you press ENTER. Now you’re ready for fine-tuning your centring…the important part to know though is that the drive for the scope has slippage in it. To keep it tight, and give yourself the best alignment, you want to be pressing UP and RIGHT as the last two movements on your scope before pressing align. For me, with a star diagonal on my scope, it means I need to be in the upper left quadrant of my eyepiece. Then, when I press UP it will take me down towards the middle, and right will take me the right to get to the middle. If I overshoot either one, I can’t just back up a little, because that would mean going down or left on the hand controller i.e. within the “play” of the scope, and the alignment won’t be tight. Instead, I have to go past the middle points again, back to the upper left quadrant, and then go UP and RIGHT on the hand controller to get to where I think the middle is. (** Note that UP / RIGHT is only “tight” if your motor speed is 1-6 at that point, speed 7-9 would be the opposite.) How do you know if you’re in the “middle”? Three ways:
Eyeball it. Of course, the less precise you are, the greater the margin of error when you’re done. Then press ALIGN;
Use a lighted reticule — this is basically an eyepiece you can buy that has a little red light in it and a grid. It looks like a target screen. You can use your general eyepiece to get in close to the centre, and then this lighted one to get it exactly dead-centre. Then press ALIGN;
Use the doughnut method — this one is completely counter-intuitive. Instead of a “tight” focus, turn your focus knob to make it extremely UNFOCUSED. Your tiny little star will start to look like a small doughnut, then a medium-sized doughnut, then a large doughnut. Which will let you gauge the distance from the edge of the doughnut to the edges of your eyepiece. In other words, instead of guessing if your little marble is close to the centre of a basketball hoop, you’re unfocusing it to the size of a beachball and estimating if your large beachball is centred in the same-sized hoop. Much easier to tell how far from the “four” sides (up / down / left / right). But again, you still want to be going UP and RIGHT as your last movements. Then press ALIGN;
If you used the doughnut method, refocus to a tight star point view;
Choose Star 2 from the list (see some notes below about which combination of stars to choose). You ideally want a star that is in a different part of the sky, at least 15 degrees above the horizon, and preferably, at a different height than your first star (so that it is working with different angles, not just rotation along the same altitude). The great part is you don’t really need to know which is which. Once you press ENTER to choose the star, the mount is going to rotate to that star with its best guess as to where it is. So it might say let’s go to Skat. Except you don’t know Skat at all. Doesn’t matter. Because when it slews to Skat, you’re going to likely see only one really bright star within a Field of View (FoV) of where it stopped. In other words, you’ll just go to the nearest bright star to where it stops, centre it in the same way as you did for the first star, get it close to centre in your eyepiece, press ENTER. Then do your UP and RIGHT to do a final alignment to centre (with eyeballing it, using a lighted reticule, or making it look like a doughnut again). Press align;
You should get a message after a few seconds that says “Alignment Success”;
Test your alignment. Most people will pick a third target and say, “Okay, let’s look at Saturn.” Which makes sense, right? You did alignment on two stars, let’s see how it finds a third. Instead, though, you should tell it to go back to the first star (Mizar in my example above). Because it’s one of your alignment stars, you should be DEAD CENTRE for that star. And then you can tell it to go back to Star 2. If either are not dead centre, something’s wrong with your alignment. And if I had to guess, I would bet it was the UP and RIGHT play for your final alignment. It could also be levelling, or your choice stars, or whatever, but I’m betting you’re off with the final alignment step, it’s the most common. Which part of the alignment was the problem? If you’re generally above or below the star, it was your vertical (your final UP motion) aka your altitude. If you’re generally left or right of the target, it is the horizontal (your final RIGHT motion) aka your azimuth. Note that on my default settings, the UP/DOWN settings were initially set to INVERTED in the menu, so I spent two years doing UP and RIGHT without realizing I was ACTUALLY doing DOWN and RIGHT, thus throwing off my altitude every time. Grrr…;
If your two alignment stars came back solid, you’re good to go. Turn off your TelRad;
Start looking for new objects! Note that objects close to your alignment stars will be the most precise, including those in between. Those objects farther away from those points of alignment will be less precise, but likely still within the FoV of a 25mm eyepiece. That was the default EP sold with the 8SE in most cases, and apparently the accuracy of the scope was kind of geared to it.
Choosing good stars
What are the best two stars to choose? There are some basic tips online ranging from types of two-stars (generally at different altitudes, not complete polar opposites, both more than 15 degrees above the horizon, etc.) to specific suggestions. On CloudyNights, a guy named Curt B posted back in 2015 and suggested the following stars:
January: Capella & Aldebaran
February / March: Sirius & Rigel
April: Regulus & Procyon
May: Regulus & Arcturus
June/July: Vega & Arcturus
August: Altair & Deneb
September: Altair & Rasalhague/Vega
October: Altair & Vega
November: Altair & Caph/Vega
December: Enif & Hamal
As I mentioned above, I often choose Mizar if it isn’t too high because it is so CLEARLY Mizar and not something else. Most people start with Polaris as they are confident they can find it. Depending on my light polluted skies, I’m not always 100% sure. Mizar has no doubts. Some people like software combos on their desktop to make a list and http://www.ilanga.com/bestpair/ has some free software. It has been superceded by a program called AstroPlanner, but you have to pay for that one (although it has lots of great functions). If I run Best Pair II, and enter the 15th of the month for 2017 and 8:00 p.m., here is what I get as the best pair in my rough area (Ottawa):
Jan 15: Deneb and Arcturus
Feb 15: Vega and Hamal
Mar 15: Vega and Hamal
Apr 15: Vega and Hamal
May 15: Polaris and Mira
June 15: Bogardus and Markab
July 15: Capella and Denebola
Aug 15: Capella and Denebola
Sept 15: Alkaid and Procyon
Oct 15: Alkaid and Procyon
Nov 15: Vega and Denebola
Dec 15: Alkaid and Altair
None of which are Mizar. Vega, Altair, Arcturus, Polaris and Capella are great choices, eminently “findable” with the naked eye, and would give you one star out of the two to start with for 9 of the 12 months. Not bad.
Alternatively, there is a program by Jean Piquette, and available from the NexStar resource site that Michael Swanson runs. http://www.nexstarsite.com/Downloads.htm#SAS will take you to the program for download. This is a bit more technical than most people are likely going to be comfortable with in terms of setup…you have to edit a couple of text files to put in your info, then run the program, with it spitting out a few files that will tell you good choices. It is based on the 21 “NexStar” alignment stars that it likes by default.
When I run it today, Oct 22, 2017, it suggests the following for my area:
Altair Polaris
Altair Mizar
Vega Polaris
Vega Mizar
Vega Altair
Polaris Mizar
Six combinations of Altair, Polaris, Mizar and Vega, and almost all of which I could find no problem. Overall, I would say that this estimate is far better for me than the other one, although the first one has more range in a choice of possible stars. This one does, however, give out a MUCH longer list of choices too, almost overwhelming in fact.
I’ll keep both programs and see what they give me from time to time. Something else to remember to do before I leave the house though. I’d prefer an app for that, and there ARE some options for downloading things in Sky Portal and/or Sky Safari Pro, but I’m not entirely clear how to combine the lists properly for prioritization. More like “good sets” in general, regardless if they are actually visible tonight or make good combos for tonight compared to others.
But I’m getting farther afield from the original premise — how to align properly for a general process, not which stars are chosen. Hope this helps. Of course, your mileage may vary.
I had one of those handheld telescopes when I was a kid, and I tried to look at the stars, but well, that went about as well as you think it might have gone. I couldn’t see diddly except for the moon. And even then, I never saw ridges. Then five years ago, I bought a real telescope (Celestron NexStar 8SE below) and attempted to embrace my new hobby without a lot of success.
I’m not a star-hopper kind of learner
Now, I’m going to deal with a giant issue right upfront to get it out of the way. I tried a variety of scopes both before and after I bought my scope, and it was very clear when I was done that I had bought the right scope and mount for me. Easy setup, good value for money, a few steps above entry-level, and a computerized scope to help me get going. I mention this because as I describe some of the problems to come, there is a rabid group of starhoppers out there who think the goto motorized scopes are either a waste of money or the devil’s spawn for learning or just more trouble than they’re worth. It’s a lot like someone who likes baking telling someone who has trouble working a bread machine that they should just skip it altogether and make bread by hand. It’s an option but has nothing to do with solving the bread machine problem that the person actually has.
In my case, I fully understand and respect their advice. I just don’t agree with it for me, because that’s not how my brain works. If I have to star hop and struggle with the first few outings, I’ll be done. My frustration levels with some of the other types of scope, many of which I borrowed over the course of a summer from the local astronomy group, were considerable. With my scope, the Celestron NexStar 8SE (one of the big orange tubes), I could get set up and be ready to start alignment in about 5 or 10 minutes depending on how far my site was from the car. I often spend more time walking back and forth than actually physically setting up the scope but that would be true of any of the scopes in terms of getting stuff from car to viewing spot.
And I had some early success. Saturn was popular with not only me but some of the family, as Saturn always is. The moon was a bigger surprise, I didn’t think I would get that much fun out of viewing it, but I do. I’ve seen Venus, Jupiter, Saturn, Mars, Neptune, and Uranus. I haven’t seen Mercury or Pluto yet.
Some success, some struggles
But after that, I struggled. Well, sort of. It was hard to be sure. I would do my alignment, the scope would say “success”, I would look at planets and the moon and a few things, and then I would try for a few harder options. Like the Andromeda galaxy. Easily seeable as a faint smudgy. Except I couldn’t sometimes. Nada. Nothing. Yet I trusted my scope, so what was the problem?
I had it broken down into several possibilities…perhaps my eyesight wasn’t good enough. Perhaps my scope wasn’t powerful enough, or the optics (tube or lenses) were not high enough quality. Or it was the fact that I was mostly using the scope in light-polluted skies. Or alignment. Or my expectations were way too high. Or I was just an idiot. It was hard to figure out which one was the actual cause. All I knew was that it didn’t seem to be performing as well as I thought it should. But which one(s) was an actual problem?
In an earlier post (Finally learning with the Celestron NexStar 8SE), I outlined how I went to a star party after three years of sub-par usage on my own and was “mirroring” another guy’s viewing session. He would go to object A, and I would go to object A. Then I would look through both scopes and compare. Pretty similar quality. His seemed a bit better, but not in a worrisome way. Then he went to the Ring Nebula, I went to the Ring Nebula, and wtf? No Ring Nebula for me. It just wasn’t there. Now, I had never seen it before so I didn’t know if perhaps it was so faint and his “better” setup would see it, but I wouldn’t. Maybe it was beyond my scope. So he came over, assured me we should be able to see it, moved my scope manually with the hand controller, and bob’s your uncle, the Ring Nebula. My alignment was off. There was nothing wrong with anything except alignment and my own knowledge.
And while I felt a bit stupid, I now had an answer. And I realized later that I probably would NEVER have figured that on my own. I needed to know what my expectations should be, and the only way to know that was to compare it to someone else’s scope and have him confirm I wasn’t over-estimating what I should expect. I just hadn’t had the right combination of a good comparator and star buddy for an evening.
So, great, it was an alignment issue. I could fix that, couldn’t I?
Well, perhaps. Although in the end, it fell into basic, moderate and advanced diagnostics.
For the basic diagnostics, I read the manuals, I searched the online forums, I read tips and tricks, I watched videos, I talked to the telescope people. And I realized there were certain things that could improve my alignment process. Like levelling the scope more accurately. Like using a lighted 12mm reticule to make sure the alignment stars were as close to dead centre as possible. I also expanded my three-star choices to cover more of the sky. I started using precise GPS coordinates instead of cities.
For the moderate diagnostics, I was a bit worried about the mount itself (a previous gear problem) but it seemed to check out; I had it collimated with the laser option at the store, was still good; my diagonal was fine, and my firmware on the mount could have been out of date (seems fine still). Between the changes in basic and moderate, I started having more consistent results, and I honestly thought it was “solved”. I even managed to do an actual sky tour two years ago, not too long after the star party (A sky tour with my new setup). I was on my way.
And then I wasn’t.
Over the last two years, that initial success with the improved alignment process (basic and medium) produced only one consistent thing — inconsistent alignment results. Sometimes I could see Andromeda, sometimes I couldn’t. Sometimes I could see the Ring Nebula, sometimes I couldn’t. It’s been driving me crazy. In 2015, I used it a couple of times, got frustrated, and quit for the most part. In 2016, with the summer coming, I got excited again, motivated to make it work. Then I had inconsistent alignment, got frustrated and stopped again. I just didn’t know what I was doing wrong. The local astronomy club had some telescope clinics, but I didn’t have trouble with the initial setup that could be taught during the day, I needed tips for actual night time setup. I had hoped for a mentoring program that was being looked at, but it didn’t pan out for me. I had one member who was convinced we could find someone in the club who could solve this and he did a lot of outreach to people to try and find someone. Even the guy at the telescope store was offering to do a viewing night at his house one night, but the challenge in my view (rightly as it turned out) was not a general telescope issue, I needed someone with experience with this type of mount and controller.
So I went online again. I haunted Cloudy Nights out the wazoo. And I noticed something. Two-thirds of the really good posts summarized other posts by the same person. A guy, T, was quite active and had pretty good expertise. I saw a lot of things that were possible causes that could be out there still for fixing my alignment problem, but knowing which ones I should try first were hard to prioritize. And I needed to know if my expectations were too high…maybe this scope’s operation was as good as it got. So I emailed him to describe my problem and to ask, “Am I over-estimating what my scope and mount can do?”. While he didn’t directly answer that question, over a series of emails, he made it clear that I wasn’t over-estimating, and instead, he started helping come up with ideas of things to try in order to narrow down the likely problems. I outlined some of them in a series of posts on this blog ( Hazy astronomy viewing last weekend, Good location, lousy set up by me…, Attempt #0 of 5 to save my hobby, Continuing to diagnose alignment issues, and One step forward, three steps back…). What do they all have in common?
Increasing frustration by me to solve the problem. Here’s my list of “possible issues” to consider, my advanced diagnostics list:
Hand controller errors;
Power;
Degree of play in alt-azimuth directions;
Slew motion and backlash settings; and/or
Two-star alignment rather than three-star alignment.
So I thought I had a shot at some of those. I reset the hand controller to factory default settings…if anything was wonky in the setup, it was gone. I tried new batteries to eliminate a variable but had the same result with and without the external Lithium-Ion power pack, so it wasn’t power. I wasn’t sure about the degree of play, I couldn’t get the slew motion to work, and the two-star alignment was “okay”, not stellar (okay, small pun, I promise I’ll avoid them for the rest of the post).
A total shit-show night. And my confidence and approach hit rock bottom. I was no longer confident it was the scope and not just me being the stupidest wannabe astronomer on the planet. And I tried one last desperate plea. I sent a message to the two local astronomy groups offering to pay someone to tell me I was an idiot. Seriously, this is the email I sent:
Soooo, I’m officially getting desperate now with my scope. Basically, I’ve been using my Celestron 8SE for almost 5 years, with the same basic pattern. I use it for about six months, never get a good alignment, get frustrated, give up, and ignore it over the winter. Sometime the next spring or summer, I drag it out, I see a few things, get excited, try to improve some basic alignments, see a few more things but miss a lot, get frustrated, put it away for six months.
An expert has been helping me recently on Cloudy Nights with some diagnostics, and (M) has a line on someone who might be able to help when they get back into town in a few weeks. But I need a guaranteed solution, and I asked earlier if anyone wanted to make money. So here’s what I am going to do.
First, I’m taking the gear in (to the store) to have them check slew rates, backlash, etc. A number of years ago, I had a gear meshing problem and it had to go to Celestron for repair for two months. Maybe it was fixed right, maybe it’s still messed up, I have no idea. I have no way to know myself.
Second, I need someone who knows Celestron 8SEs or equivalent to come out for an hour or two and tell me if either the mount is a piece of crap or I’m the stupidest person on the planet. I have no idea how much to pay you, name your price. Yes, I know, people will say “Oh, don’t have to pay, people can help”, but the short version is I’ve wasted five years to this point and I don’t think I’ve ever had one single night of good viewing with proper alignment.
So, yes, I’m willing to pay you to use my scope and then tell me if I’m just too stupid to own a scope. And then I can sell it all off or something. Take up knitting. I can probably learn that from YouTube videos or something, I hear.
So who wants to make some money telling me if it’s my scope or me? After five years, I don’t have too much optimism left, to be honest. If I can’t even get a stupid GoTo scope to work…sigh. Let me know if you’re interested…my goal is a final decision to continue or dump the hobby by November 15th.
I signed it the Idiot Astronomer. Why am I repeating the text of the email here? Because it drips with frustration. I was deadly serious that if I couldn’t have a working option by November 15th, I was pulling the plug. I just couldn’t take the stress and frustration and inconsistent results anymore.
I got about 8 responses across the two groups. Two encouraged me to hang in there, they were frustrated too in the beginning. Two suggested I switch to star hopping. One gave me some suggestions of things to try. And three offered to work with me on it directly. None of them wanted to be paid, they just wanted to help.
One of the first to respond, A, had worked with the scope, and I took him up on his offer early. We agreed to meet at his place, and I went out one night last week. A much darker area than I have in Centrepointe, but also taller trees, but that wasn’t going to be a problem. I told him some of the history from above, trying not to turn it into a giant pity party or sob story.
When I was done my recap, he told me a bit about his experience. Including that he had programmed some of the software that the mount and handset were using. Holy crap. What a resource. I think my optimism started to bounce right away.
Working with the expert
The first thing he said he wanted to check was the alt-azimuth movements. The guy at CloudyNights had mentioned trying to figure out if when I went left / right or up / down, did the scope stop when I took my finger off the direction button? It did, but rather than a quick dead stop, it was more like a slightly gentle slow down for half a second. Was that a problem? This guy, A, checked it and it seemed okay. Not a lot of play, good tight resistance. A good sign.
We ignored fine-tuning the levelling — it was good enough for our test, but I do have a bubble level and a clinometer app on my phone that works well enough.
Then he wanted to check the encoder card. That wasn’t on my list and I didn’t even know what it was! He moved the scope to a set position, identified on the handset what the “position” it thought it was facing, and then slewed the scope in a full 360-degree turn right back to the exact physical spot where it had been previously. And then he checked to see if the angles were the same. They were. If they weren’t, i.e. if the scope had gone 360 degrees physically but the scope registered less than or more than 360, then all the alignment attempts in the world wouldn’t help — it would mean that the scope wasn’t tracking properly so it wouldn’t have known where it was even looking at any given time. But it worked fine, so that wasn’t the problem. That also eliminated backlash and confirmed the alt-azimuth movements.
Now it was time to try an actual alignment. I mentioned in passing that the CloudyNights site said an automated two-star alignment was better than a three-star alignment, and I confessed that it made no sense to me. How could two stars be better than a full triangulation? He knew the answer — mainly that 3-star wasn’t really a 3-star triangulation. It took the 3 stars, and then used the best two of the three. It was still a two-star alignment. However, the automated 2-star or the manual 2-star used KNOWN stars. Pre-programmed stars. Precise stars.
So he did a 2-star alignment, and it failed. I actually felt a little bit of sick confirmation at that — even with his experience and knowledge, it failed the first time. We moved the scope physically to give a better view of some western/northern stars and did it again. Success. I also learned that the programming assumed people were using a 25mm lens, as that was the default one shipped with the scope. Meaning that the margin of error for 1 Field of View (FOV) was basically the 25mm size. So we used that one for the test.
Now, with the alignment set, it was time to test a few stars. But before doing so, he told it to go BACK to the first star we had chosen. If alignment was solid, it should be dead centre. It wasn’t. It was considerably down and a little to the left of centre (noting I have a 90-degree star diagonal on the scope). WTF? That shouldn’t happen.
So he told it to go back to Star 2. Again, it wasn’t dead-centre. It was off. But, interestingly, it was off by the SAME amount as the first star had been off. Relatively fine for left-right, but off on the altitude setting (up/down).
Which, when I think about it, I had always suspected. When I did my alignments, I was frequently off more by height than left/right.
But the fact that it was off by the same amount, and mostly altitude, he had an inkling where the problem might be. The final tracking just before alignment was imprecise/loose.
That takes a bit more explanation, and I’m likely to completely misdescribe the problem. The scope can go left or right, up or down. But when aligning, you are supposed to always go right and up as your last movements. I link to think of it as like a drive train — if you go right and/or up, the train is tight. If you go the other way, there’s a bit of slippage before it goes tight. So it always requires you to go up and right. Up and right. If you go past the centre when you’re aligning, you go back left and down and then up and right again. Always those two directions at the end.
Now, the right / left part seemed fine. But the up wasn’t “tight” for the actual alignment. I mentioned to him that because I had a star diagonal, the various fora said that technically I was going down and right in the eyepiece. Which is true, but he said that regardless, it didn’t matter what was in the eyepiece, it only mattered what was done on the hand controller. That had to be up and right.
Which made me think of something I had seen in the settings. When I reset to the default settings, I had checked a bunch of settings looking for anything that might be set wrong. But it all seemed fine. Yet, when he mentioned that it was only the handset controls that mattered, I realized that while the setting for azimuth (left / right) was set to normal, the default setting for altitude was REVERSE. This meant that the default was WRONG for telling it to go up and right — it was not going up and right when it was reversed, it was going DOWN and right. In other words, it was deliberately choosing the loose setting for height.
We reversed the setting i.e. made it normal, and then he realigned. When he was done, he went back to STAR 1 and checked in the eyepiece.
Dead-centre.
Star 2? Dead-centre.
Near perfect alignment. But let’s not get cocky. Those were the alignment stars, they SHOULD be aligned.
So I started doing a star tour. While not everything else was dead centre, it was well within the eyepiece FoV. I played for over an hour, and all the tests seemed fine. Better than fine. More like “Voted the best alignment in five years”-fine. Freaking awesome.
He even showed me some advanced options for a precise GOTO and for a SYNCH goto option. Basically both add some temporary precision to a go-to by first going to a star in the area and then when you confirm alignment for it, it then knows where your nearby target is with more precision. Which means if I am having trouble finding something, I can give it a temporary “boost”. A huge tool to have. He even explained how to do a two-star alignment during the day! Mind blown.
Which if I left off here would seem like he solved all the problems, all great. But in the end, the real issue was a setting in the hand controller setup. I would never have known all the other issues were fine on my own. I needed him to weed that out as a possibility. And with the basic and medium all taken care of earlier, and some of the advanced eliminated, I at least had it down to a narrower field of suspects.
And yet, I still feel like an idiot. Five years of struggling with alignment to find out there really aren’t anything likely wrong with the scope or anything. I just was doing it completely wrong because the default wasn’t set to what the instructions told me to do. I went up and right, and the computer program went down and right. So I was never “tight” with my drive train equivalent, and my altitude settings have always been off. Which isn’t to say all the other things didn’t play a factor, I’m sure they did.
But the big issue of the handset controller settings being wrong would have never been found if I didn’t have someone like him to walk through the other options and eliminate all of them one by one.
So where does this leave me?
Well, I did the outing with him early last week (about 10 days ago). And then had no nights to test it myself here in Ottawa. I took the scope with me to the Kawarthas last weekend and had no chance to use it. This week has not been too kind. Until tonight.
Tonight I tested it all myself. My setup. My alignment. My test. All me.
In one of the posts that I mentioned earlier (Attempt #0 of 5 to save my hobby), I created a full formal test for myself. Evaluation criteria that if and when I had a new approach, I would try and find a set list of options, award points for various areas, and total up my score. If I got a decent score on five test nights, I would stick with the hobby. If I didn’t, I’d quit.
After the test tonight, I’ve decided to quit.
The testing, not the hobby. Because there is no need for further testing.
Because…drum roll, please…
It freaking worked!!!
Once physically set up, I marked how long it would take me to do an actual alignment. My goal was five minutes, and definitely less than 10. How about less than 2? I then made an adjustment, tweaked a setting, redid it, and was all aligned again. All in less than 5 minutes in TOTAL for two alignments. With testing against star 1 and star 2 to see how it went. Not as perfect as the other night, but pretty good. I also had it work on the FIRST attempt. Full marks, not even close to a problem. The way I had always hoped it would work.
I then tested it on a series of targets. My only available planets from this site at that time were Uranus and Neptune. Uranus was easy, Neptune was playing hide and seek. But I had a small tree problem that I was peering around for Neptune, and seeing was terrible anyway. I feel like I was in the right area, just couldn’t zero in to confirm it. I’m giving it full marks anyway.
Then I moved on to stars — Almach, Rasalgethi, Albireo, Mizar, Polaris, Gamma Ari, Kappo Bo, and Epsilon Bo. Eight stars, eight successes. Again, full marks.
For clusters and galaxies, I found Andromeda, Hercules, M92, Ring Nebula, Dumbbell Nebula, Double Cluster, M29, M34, Horseshoe Cluster, M05 and M13. Eleven more, eleven successes.
Twenty-one targets, twenty successes. The only one that was off was Neptune, and I’m not counting that one either way. 20 for 20.
I don’t need further testing, it WORKED exactly the way it is supposed to work.
My hobby is alive. Thanks to R at the star party who narrowed my problem down to alignment and to A for an evening that confirmed it was mainly the handset settings messing up my altitude movements. And to T who went above and beyond the call of duty on CloudyNights to even get me into the ballpark.
I still have a little way to go in order to be a little more consistent each time in my setup, but wow, I can’t believe it worked. Five years to get here. Now I can start really learning.
So I’ve been fighting through my astronomy challenges with my scope (Celestron 8SE), mostly with the support of a guy in one of the forums on a site called Cloudy Nights (i.e. when you have clear nights, you go outside; when you have cloudy nights, you can go online!). He’s super knowledgeable, and while he’s not active in the forum anymore, he’s been giving me fantastic suggestions on things to improve my approach.
Tonight, I went to what I consider level 3. Level 1 would be standard stuff. Level 2 would be the tweaking and adjustments I’ve done up until now.
Level 3 i.e. tonight was to check to see if the rate at which the mount slews left / right and up / down is set correctly. Or more accurately, if there is enough tension to stop it from playing too much when aligned. How did it go?
It was a total shit show.
I got it to align, I followed the instructions, everything seemed to go okay. I tried adjusting the settings but didn’t seem to make much difference (it’s a scale from 0 to 99, you start small and make increments). I still felt I was having too much play. And when I set it too high, it became “jumpy” in its movements. Reset back to the basics. I did see one setting in all of it which seemed to be set wrong, and I corrected it.
Did some test slewing. Saturn was behind a building (I was just testing from my backyard), but it was about where Saturn was. Tried Uranus, and it showed me again behind another building, but honestly, it seemed way too far east and north. Tried for Neptune, nothing where it was, but the moon is kind of bright, so could be a glitch.
Then I told it to show me M110. Which it tried to do. By going VERTICAL? Almost straight up. In fact, partly past vertical. I eventually had to stop it. Tried Andromeda, and it wanted to go past 90 degrees vertical, almost like flipping over to the other axis.
Like I said, total shit show.
I’m out of my depth. I’ll try taking it to the telescope store tomorrow, but right now, I’m out of options.